A Pro’s Guide: How to Use Peel and Stick Wallpaper Without Bubbles
Renter-Friendly Decorating Peel and stick wallpaper is a game-changer for renters and DIY decorators. It promises a dramatic transformation without the commitment (or the messy paste) of traditional wallpaper. But this dream project can quickly turn into a nightmare if you’re left with a wall full of frustrating bubbles and creases.
So, how do you get that flawless, professional finish you see on Pinterest?
In my experience transforming countless rooms, the secret isn’t some magic trick—it’s all about preparation and technique. I’ve learned the hard way what works and what doesn’t. Today, I’m sharing the exact method I use to apply peel and stick wallpaper without a single bubble in sight.
Follow these steps, and you’ll get a result so smooth, everyone will think you hired a professional.
Quick Summary: The Bubble-Free Method
For those in a hurry, here’s the secret sauce to a perfect application:
- Pristine Walls are Key: Clean your walls with an ISP/water mix and let them dry for 24 hours. A smooth, clean surface is non-negotiable.
- Gather the Right Tools: A good application kit with a felt-edged squeegee is your best friend.
- Work Slowly: Apply the wallpaper in small sections, smoothing from the center out as you go. Never peel the entire backing off at once.
- Overlap Slightly: For a seamless pattern, overlap your panels by about 1/8 inch.
First, Why Do Bubbles Even Happen?
Understanding the enemy is the first step to defeating it. Air bubbles are usually caused by three simple things:
- Trapped Air: This is the most common culprit. It happens when you apply the paper too quickly or don’t smooth it down properly.
- Dust and Debris: Tiny specks of dust, dirt, or wall imperfections create a gap between the wallpaper and the wall, forming a small bubble.
- Uneven Surfaces: Applying peel and stick wallpaper to a heavily textured or unsanded wall is asking for trouble. The adhesive can’t make a solid connection, leading to pockets of air.
The good news? All of these are completely preventable.
Your Toolkit for a Flawless, Bubble-Free Finish
Before you even think about peeling that backing, gather your tools. Having the right equipment makes the job 10 times easier. Trust me on this.
- A Felt-Edged Squeegee: This is the MVP. The felt edge prevents you from scratching or tearing the wallpaper as you smooth it.
- A Sharp Craft Knife (or Utility Knife): For precise trimming around outlets and baseboards. Make sure you have fresh blades!
- Measuring Tape & Pencil: For accurate measurements and marking your guidelines.
- A Level or Laser Level: To ensure your first panel is perfectly straight. If the first one is crooked, they all will be.
- A Clean, Damp Cloth: For wiping down the walls beforehand.
Pro Tip: You can buy these items separately, but I highly recommend getting an all-in-one Wallpaper Application Kit. They are inexpensive and include everything you need for a perfect job.
The 5-Step Method: How to Use Peel and Stick Wallpaper Without Bubbles
Alright, let’s get to the main event. Follow these five steps precisely for a stunning, bubble-free wall.
Step 1: Wall Preparation is Non-Negotiable
This is the most-skipped step, and it’s the most critical. You cannot get a smooth finish on a dirty or dusty wall.
- Clean the Surface: Mix a solution of 50/50 isopropyl alcohol and water. Wipe down the entire wall surface with a clean cloth and let it dry completely. I recommend waiting at least 24 hours. This ensures all moisture has evaporated.
- Smooth It Out: Run your hand over the wall. Do you feel any bumps or rough patches? If so, lightly sand them with fine-grit sandpaper and wipe away the dust.
- Prime If Necessary: If your wall is newly painted, wait at least 4 weeks for the paint to fully cure. For unpainted drywall or matte/flat paint finishes, applying a coat of primer will help the wallpaper adhere better and come off cleanly later.
Step 2: Measure Twice, Cut Once
Measure the height of your wall and add 4-6 inches (10-15 cm) to your wallpaper panel before cutting. This extra length gives you some wiggle room for trimming at the top and bottom. It’s much less stressful than realizing you’ve cut a piece just a little too short!
Step 3: The “Hinge” Method for Perfect Placement
Never peel the entire backing off your wallpaper at once. This is a recipe for a sticky, tangled mess. Instead, use what I call the “hinge” method.
- Peel back only the top 6-8 inches of the backing paper.
- Fold the backing paper down, creating a crease or “hinge.”
- Align the top of your wallpaper panel with the ceiling, leaving a couple of inches of overhang. Use your level to make sure it’s perfectly straight. This first panel is the most important!
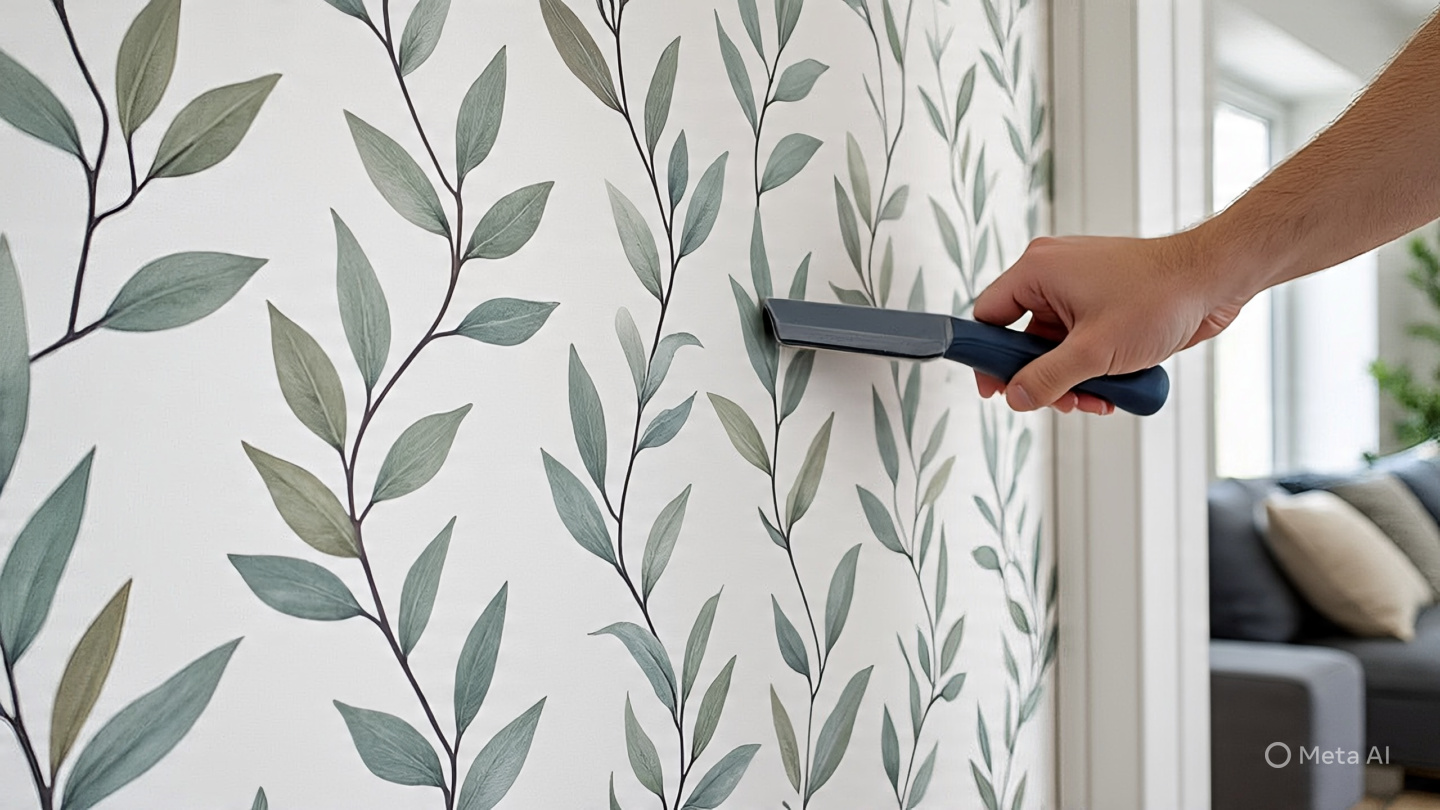
Step 4: Peel, Stick, and Smooth Like a Pro
This is where your technique matters most.
- Once the top section is aligned and lightly stuck, grab your felt-edged squeegee.
- Starting from the center of the panel, use firm, overlapping strokes to smooth the wallpaper towards the edges. Push the air out at a 45-degree angle.
- Now, slowly reach behind the wallpaper and pull the backing paper down another 6-10 inches.
- Repeat the smoothing process: from the center out. Continue this process all the way down the wall. Work slowly and deliberately. Rushing creates bubbles.

Step 5: Overlapping and Trimming for a Seamless Look
For your next panel, align the pattern with the first panel. Most peel and stick wallpapers are designed to be overlapped slightly (usually by about 1/8 inch or 1-2 mm) to prevent seams from showing if the wall expands or contracts. Check your wallpaper’s instructions for the specific overlap recommendation.
Once all your panels are up, use your sharp craft knife to carefully trim the excess paper along the ceiling and baseboards.
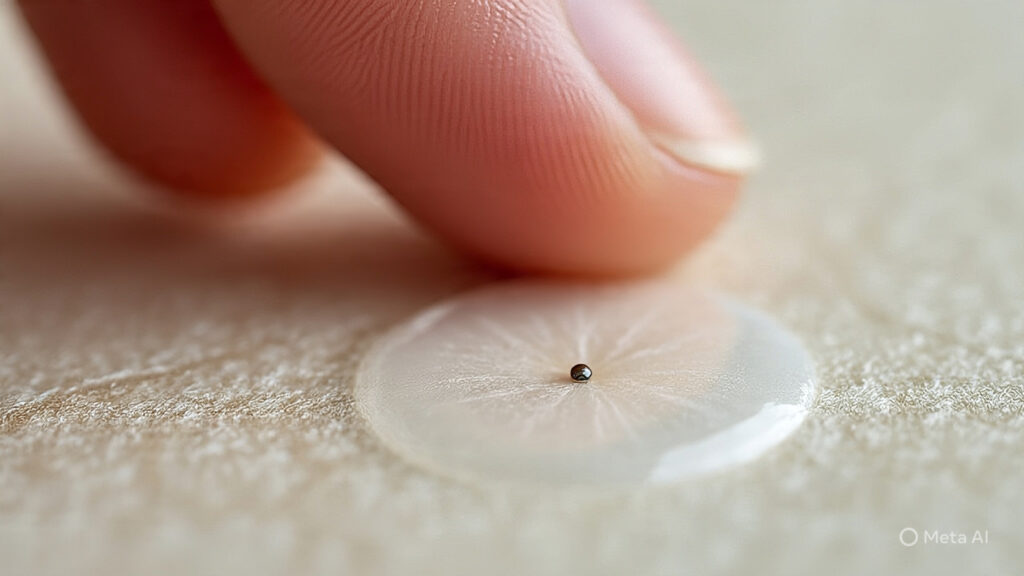
Oops! I Found a Bubble. How to Fix It After Application
Don’t panic! Even with the best technique, a tiny bubble can sometimes appear. Here’s the simple fix:
Take a very small, sharp pin or needle and gently prick the center of the bubble. Then, use your finger or the squeegee to gently press the air out through the tiny hole. The hole will be virtually invisible.
Frequently Asked Questions (FAQ)
1. Can I apply peel and stick wallpaper to textured walls? It’s not recommended. For the best, bubble-free results, the wall should be as smooth as possible. The adhesive won’t stick properly in the grooves of a textured wall, leading to widespread bubbling and peeling.
2. How long should I wait before applying wallpaper to a newly painted wall? You should wait at least 4 weeks. Paint needs time to “cure,” not just dry. Applying wallpaper too soon can trap moisture and cause both the paint and the wallpaper to fail.
3. What’s the best tool to smooth out wallpaper bubbles? A felt-edged squeegee is by far the best tool. It provides firm, even pressure without scratching the wallpaper’s surface like a hard plastic scraper might. For more project ideas, check out our guide on [Link to: 10 Creative Accent Wall Ideas for Your Living Room].
External Link for Credibility: For a deeper dive into proper wall preparation, which is the foundation of any good wallpaper job, check out this comprehensive guide on surface preparation from paint experts at Sherwin-Williams.
Your Turn to Create a Bubble-Free Masterpiece!
There you have it—the complete guide on how to use peel and stick wallpaper without bubbles. The keys are a clean wall, the right tools, and a patient application process. It might seem like a lot of steps, but taking your time with the prep work will save you from headaches later and give you a result you can be proud of.
Ready to tackle your next project? You might also love our [Link to: The Ultimate Guide to Choosing Renter-Friendly Wallpaper].
Have you tried applying peel and stick wallpaper before? What’s one tip you’d add? Share your experience in the comments below!