How to Press Flowers for Framing: A Beginner’s Guide to Timeless Botanical Art
There’s something truly magical about capturing a moment in time. Pressing flowers allows you to preserve the delicate beauty of a summer garden, a special bouquet, or a wildflower found on a hike, turning fleeting memories into stunning wall art that lasts for years.DIY Wall Art
Many people think pressing flowers is complicated, but I’m here to show you it’s one of the most rewarding and budget-friendly DIY projects you can tackle. In my experience, the key is choosing the right method for your needs and having a little patience.
This guide will walk you through everything you need to know, from picking the perfect blooms to mounting them beautifully in a frame.
Key Takeaways
- Best Flowers: Choose flowers with naturally flat faces and low moisture content, like pansies, violets, cosmos, and ferns.
- Three Core Methods: You can press flowers using a heavy book (easiest), an iron (fastest), or a dedicated flower press (best results).
- Patience is Crucial: Proper pressing takes time. Rushing the process can lead to mold or faded colors. Expect to wait anywhere from 1 to 4 weeks for the book method.
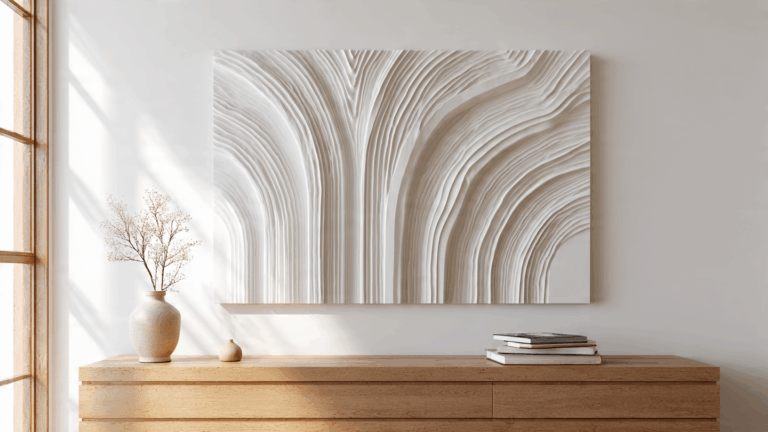
- Framing is Key: Use airtight frames, like floating frames, to protect your delicate creations from moisture and dust.
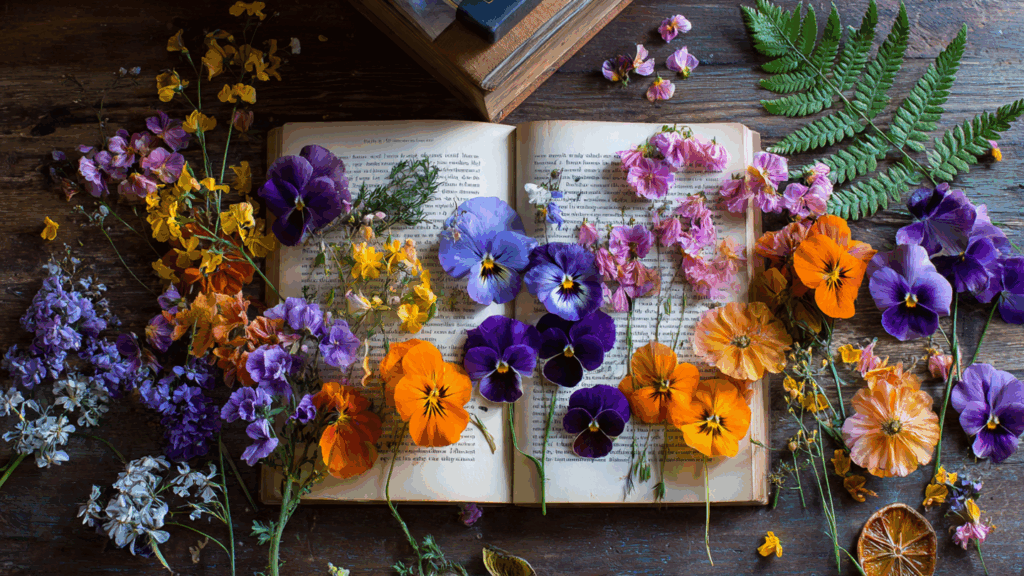
First, Choose the Best Flowers for Pressing(DIY Wall Art )
The success of your project starts with selecting the right flowers. Not all blooms are created equal when it comes to pressing.
What I’ve found works best are flowers with naturally flat heads and thin petals. Bulky flowers with high water content, like roses or peonies, are much trickier to press without turning brown.
Here are some of my go-to choices for beginners:
- Violets & Pansies: Their faces are already flat, making them incredibly easy to press.
- Ferns & Leaves: These add gorgeous greenery and structure to any arrangement.
- Cosmos & Daisies: Simple, classic, and they hold their color beautifully.
- Larkspur & Delphiniums: Excellent for adding height and a different shape to your art.
- Forget-Me-Nots: Tiny, delicate, and perfect for intricate designs.
Pro Tip: Collect your flowers on a dry, sunny morning after the dew has evaporated. This ensures they have the lowest possible moisture content, which is the secret to preventing mold and decay.
How to Press Flowers: 3 Easy Methods for Perfect Results(DIY Wall Art )
Ready to get started? Here are the three most popular and effective methods for pressing flowers at home.
Method 1: The Classic Book-Pressing Technique (Beginner-Friendly)
This is the most traditional and accessible method. All you need is a heavy book and some absorbent paper.
- Prepare Your Flower: Open your book to the middle. Lay down a sheet of absorbent paper (parchment paper or coffee filters work great) on one page.
- Position the Bloom: Arrange your flower face-down on the paper. Make sure no petals are folded over. Place another sheet of paper on top.
- Press It: Carefully close the book, ensuring you don’t shift the flower. The weight of the pages is your press.
- Add More Weight: Place 2-3 more heavy books or a brick on top of the closed book to apply even, firm pressure.
- Wait Patiently: Store the book in a dry, warm place. Leave it undisturbed for at least 2 to 4 weeks. Resist the urge to peek early, as this can ruin the press.
Method 2: The Quick Ironing Method (For a Speedy Result)
If you don’t have weeks to wait, you can use a clothing iron. This method is fast but requires a delicate touch to avoid scorching your flowers.
- Prep Your Station: Place your flower between two sheets of parchment paper.
- Empty Your Iron: Make sure your iron is completely empty of water. You must use dry heat with no steam.
- Set the Heat: Turn your iron to its lowest heat setting.
- Press Gently: Press the warm iron on top of the parchment paper for 15-20 seconds. Do not glide the iron around like you’re ironing a shirt—just press down firmly.
- Cool and Repeat: Lift the iron and let the paper cool for a minute. Repeat the process until the flower feels stiff and completely dry.
Method 3: Using a Professional Flower Press (For the Best Quality)
For those who plan to press flowers often, investing in a proper flower press is a game-changer. It provides consistent, even pressure for superior results. In my opinion, this method is the best for retaining vibrant color.
(Affiliate Product Suggestion #1)
- Product: A simple Wooden Flower Press Kit.
- Integration: “A dedicated flower press, like this highly-rated Wooden Flower Press Kit on Amazon, consists of two wooden boards tightened together with screws. It ensures perfectly flat, evenly-dried flowers every time.”
- Layer It Up: Unscrew the press and layer cardboard and blotting paper inside, just as instructed by the manufacturer.
- Arrange Your Flowers: Place your flowers on the blotting paper, leaving space between each one.
- Tighten Securely: Add the top layers of paper and cardboard, place the wooden top on, and tighten the wingnuts or straps evenly. Make them snug, but don’t overtighten and crush the blooms.
- Store and Wait: Keep the press in a dry place for 1-3 weeks, tightening the screws slightly every few days as the flowers compress.
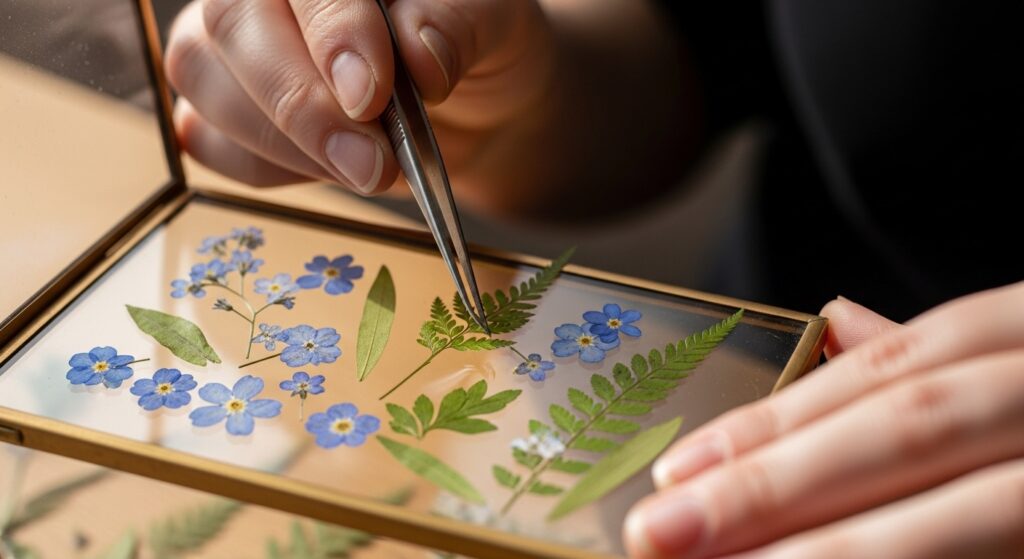
Framing Your Pressed Flowers: A Step-by-Step Guide
Once your flowers are perfectly pressed—feeling papery and dry—it’s time for the most exciting part: framing your art!
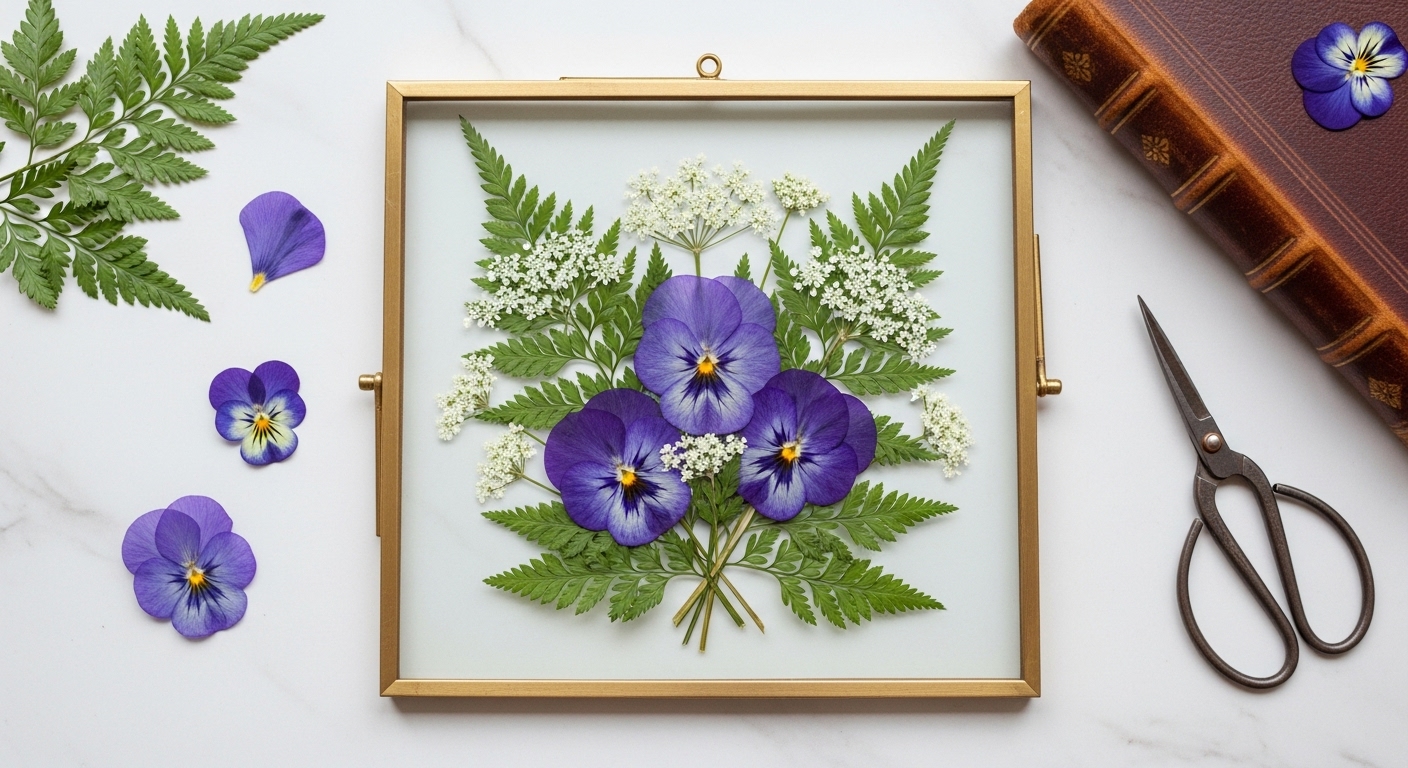
- Choose Your Frame: A floating frame, which has two panes of glass, is an excellent choice as it creates a beautiful, minimalist look. You can also use a standard frame with a matboard backing.
- Prepare Your Background: Clean the glass or matboard thoroughly to remove any dust or fingerprints.
- Arrange Your Design: Using tweezers, carefully arrange your dried flowers on the background paper or the back pane of glass. Take your time with this—plan your layout before adding any glue.
- Secure the Flowers: Once you’re happy with the arrangement, use a toothpick to apply a tiny dot of clear craft glue or PVA glue to the back of the thickest part of the stem or flower. Gently press it into place.
- Seal the Frame: Carefully place the front glass or cover back on and secure the frame. Your beautiful, one-of-a-kind piece of DIY wall art is now ready to hang!
(Affiliate Product Suggestion #2)
- Product: A set of Hanging Floating Glass Frames.
- Integration: “For a modern and elegant display, I absolutely love using a Set of Hanging Floating Glass Frames (available on Amazon). They make the flowers look like they are suspended in mid-air and fit with almost any decor style.”
Frequently Asked Questions (FAQ)
Q1: How do you keep pressed flowers from turning brown? The key is to remove moisture as quickly and thoroughly as possible. Use absorbent paper, apply firm, even pressure, and store your press in a warm, dry place. Also, starting with fresh, dry flowers (not wilted or damp ones) makes a huge difference.
Q2: What kind of paper is best for pressing flowers? You need paper that is absorbent but doesn’t have any texture or pattern that could imprint on the petals. Parchment paper, coffee filters, and acid-free blotting paper are all excellent choices. Avoid paper towels, as their textured pattern can transfer to the flowers.
Q3: Can you press flowers that are already wilting or dry? It’s best to press flowers when they are fresh and at their peak. Wilting flowers have already started to decay and will likely turn brown. Flowers that are already dry will be too brittle and will crumble under pressure.
Q4: How long do framed pressed flowers last? When protected from direct sunlight and moisture in an airtight frame, your pressed flower art can last for many years. Some colors may fade slightly over time, which is part of their natural, vintage charm. To learn more about the science of plant preservation, the University of New Hampshire Extension offers an excellent resource.
Create Your Own Botanical Masterpiece
Pressing flowers is more than just a craft; it’s a way to connect with nature and create deeply personal decor for your home. It’s a quiet, meditative process that rewards you with a unique piece of art that tells a story.
Have you ever tried pressing flowers? What are your favorite flowers to use? Share your experiences and questions in the comments below! We’d love to see what you create.