How to Apply Peel and Stick Wallpaper Without Bubbles
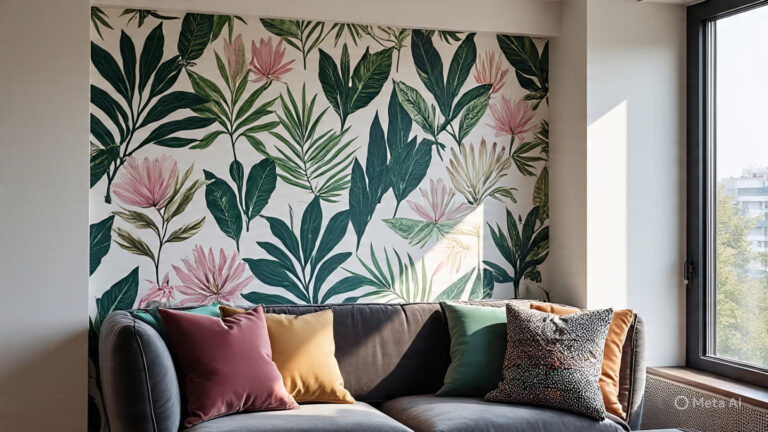
Renter-Friendly Decorating.You’ve found it. The perfect peel and stick wallpaper pattern that’s going to completely transform your space. You’re excited to give your rental a personality-packed, damage-free makeover.
But then, a wave of doubt washes over you. You’ve heard the horror stories—the dreaded bubbles, the unsightly wrinkles, the crooked lines that make your DIY project look… well, DIY.
Don’t worry. In my experience of working with countless rolls of temporary wallpaper, I can tell you that a flawless, bubble-free finish isn’t just possible; it’s completely achievable. You just need the right technique and a little bit of patience. This guide will walk you through the exact professional method I use every time.
Key Takeaways for a Perfect Application (Renter-Friendly Decorating)
Pressed for time? Here’s the cheat sheet for a smooth, bubble-free wallpaper finish:
- Preparation is Everything: Start with a clean, dry, and smooth wall. Wipe it down with an isopropyl alcohol and water solution 24 hours before you begin.
- Use the Right Tools: A simple kit with a squeegee (smoothing tool), a craft knife, and a measuring tape is non-negotiable.
- Work Slowly: Only peel back a few inches of the backing at a time as you apply the paper. Never pull the whole sheet off at once.
- Smooth from the Center: Always use your squeegee to smooth the wallpaper from the center outwards to push air to the edges.
Why Do Bubbles Happen in Removable Wallpaper Anyway? (Renter-Friendly Decorating)
Understanding the enemy is the first step to defeating it. Bubbles and wrinkles in your self-adhesive wallpaper are almost always caused by one of three things:
- Trapped Air: This is the most common culprit. If you apply the paper too quickly or smooth it improperly, small pockets of air get trapped between the wallpaper and the wall.
- A Dirty or Bumpy Surface: Any speck of dust, dirt, or wall imperfection can create a tiny lift in the paper, which results in a bubble.
- Stretching the Material: Peel and stick wallpaper has some give. If you pull or stretch it too much while applying, it will try to shrink back to its original shape later, causing bubbles or peeling.
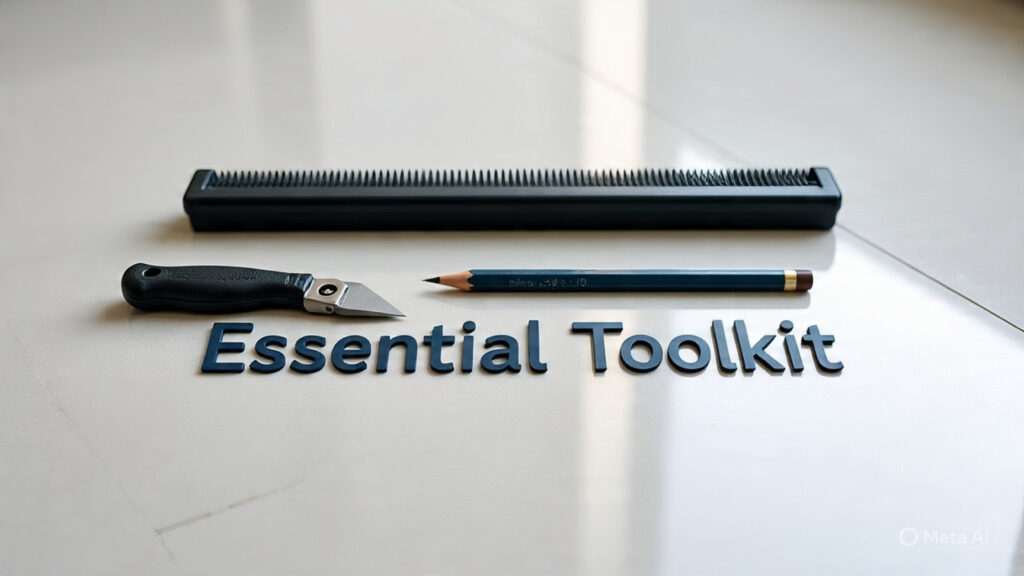
Your Essential Toolkit for a Bubble-Free Finish (Renter-Friendly Decorating)
Before you even think about peeling that backing paper, gather your supplies. Having everything within arm’s reach makes the process much smoother. Trust me, you don’t want to be on a step ladder and realize your craft knife is across the room.
- Wallpaper Smoothing Tool or Squeegee: A plastic squeegee is your best friend. A credit card can work in a pinch, but a dedicated tool is better.
- Sharp Craft Knife (with extra blades): A sharp blade is crucial for clean cuts around outlets and trim.
- Measuring Tape: For accurate measurements and straight lines.
- Level or Plumb Line: To ensure your first panel goes on perfectly straight.
- A Damp Cloth or Sponge: For cleaning the wall beforehand.
- Step Ladder: For safety and reach.
The Ultimate 7-Step Guide: How to Use Peel and Stick Wallpaper Without Bubbles
Alright, let’s get to the main event. Follow these steps precisely, and you’ll be amazed at the professional-quality results.
Step 1: The All-Important Wall Preparation
You can’t build a great house on a weak foundation, and you can’t get a smooth finish on a dirty wall.
- Clean the wall thoroughly. Mix a 50/50 solution of isopropyl alcohol and water in a spray bottle, lightly mist the wall, and wipe it down with a clean, lint-free cloth.
- Let it dry completely. I recommend waiting a full 24 hours. Any moisture on the wall will interfere with the adhesive.
- Smooth any bumps. Run your hand over the wall. If you feel any bumps or imperfections, lightly sand them down and wipe away the dust. For more details on wall prep, this guide from [External Link Suggestion: Sherwin-Williams on preparing interior walls] is a fantastic resource.
Step 2: Measure Twice, Cut Once
Measure the height of your wall and add 4 inches (about 10 cm) to your measurement. This extra length gives you some wiggle room at the top and bottom, which you’ll trim off later for a perfect edge. Cut your first panel to this length.
Step 3: The “Peel and Hinge” Method
This is the secret sauce. Do not peel the entire backing off at once!
Start at the top corner of your wall. Peel back only the first 6-8 inches of the backing paper and fold it down, creating a “hinge.” Align the top edge of your wallpaper with the ceiling, leaving about 2 inches of excess. Use your level to make sure the vertical edge is perfectly straight.
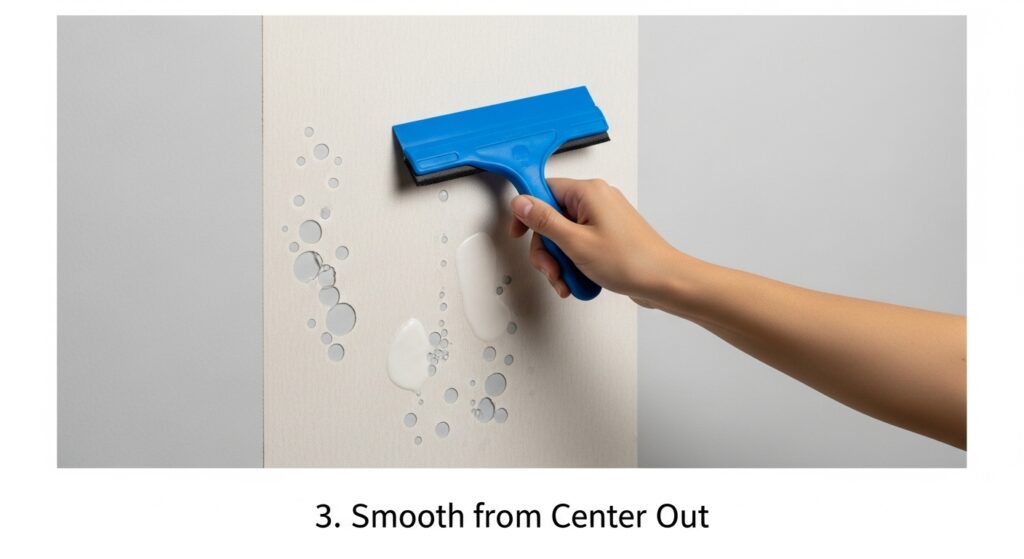
Step 4: Smooth Like a Pro
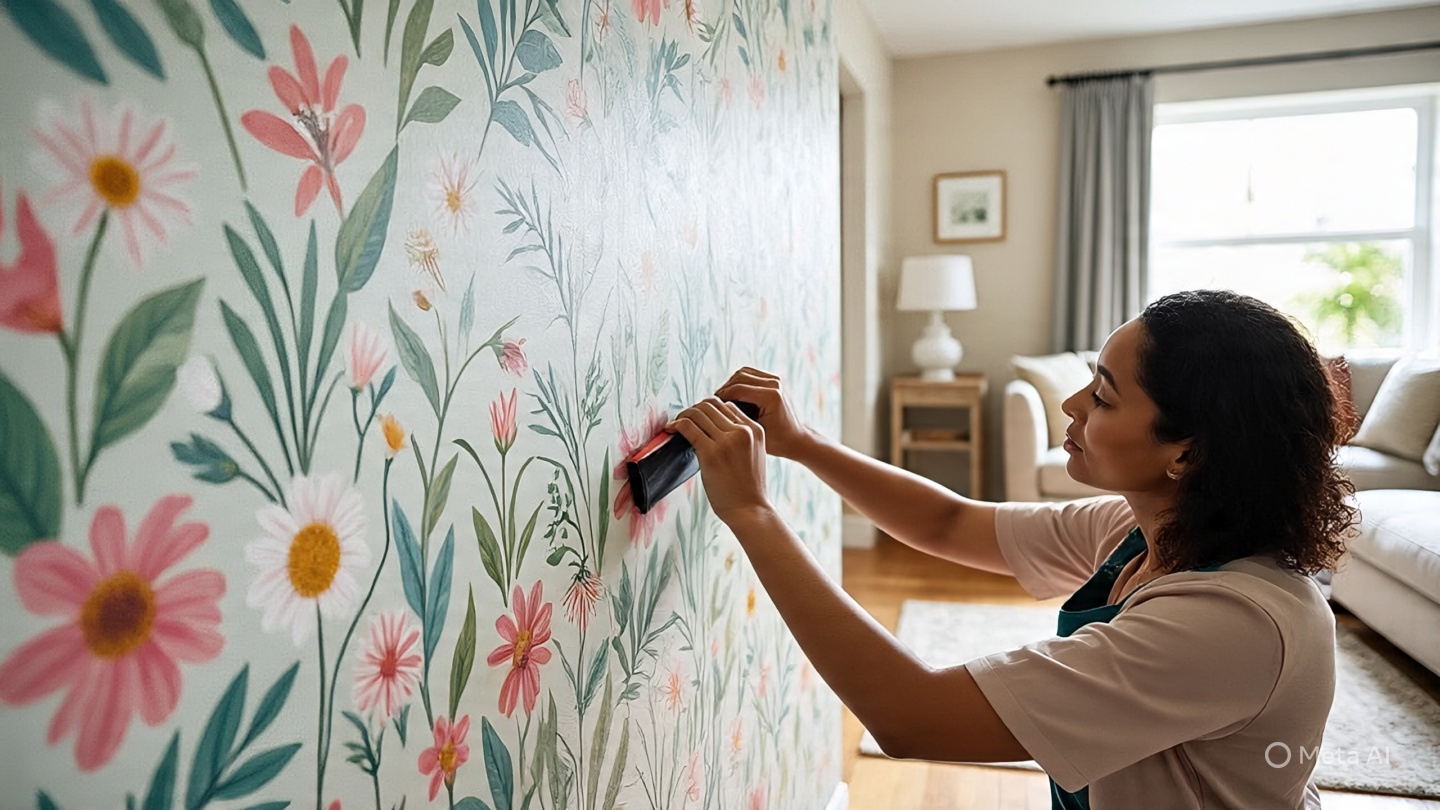
Once the top of the panel is in place and straight, grab your squeegee.
Starting from the center of the panel, press firmly and smooth outwards towards the edges at a 45-degree angle. This technique systematically pushes any potential air pockets out to the sides instead of trapping them in the middle.
Continue this process, slowly pulling the backing paper down with one hand while smoothing with the other. Work in small, 1-foot sections. Patience here is key to a bubble-free application.
Step 5: Overlap for Seamlessness
For your second panel, slightly overlap it with the first (about 1/16 of an inch or 1.5 mm, unless the manufacturer states otherwise). This prevents any gaps from appearing if the wallpaper shrinks slightly over time. Use the pattern on the wallpaper to guide your alignment.
Step 6: Tackle Tricky Areas
When you reach an outlet or light switch, turn off the power first! Let the wallpaper hang over the obstacle, make small relief cuts from the center of the outlet outwards, and then trim around the edges with your sharp craft knife. Smooth the paper down around it.
Step 7: The Final Trim and Inspection
Once all your panels are up, use your sharp craft knife and a straight edge (like your squeegee) to trim the excess wallpaper along the ceiling and baseboards. Run your hand over the entire surface to feel for any sneaky bubbles you might have missed.
My Pro Tip: What to Do If You Still Get a Bubble
Don’t panic! It happens to the best of us. If you find a small bubble after you’ve finished, you can fix it easily.
Take a pin or the very tip of your craft knife and make a tiny puncture in the center of the bubble. Then, use your finger or squeegee to gently press the air out through the tiny hole. The hole will be virtually invisible.
Best Tools: Peel and Stick Wallpaper Application Kits
If you want to make your life easier, I highly recommend investing in a simple kit. It has everything you need in one place and ensures you’re using tools designed for the job.
Conclusion: Your Bubble-Free Wall Awaits!
Applying peel and stick wallpaper without bubbles isn’t about luck; it’s about method. By preparing your wall, using the right tools, and following a slow, deliberate smoothing technique, you can achieve a stunning, professional-looking wall that will elevate your entire room.
It’s one of the most impactful, renter-friendly decorating projects you can do. Now you have the confidence and the know-how to do it perfectly.
Frequently Asked Questionslk
Q1: Can I use peel and stick wallpaper on textured walls? In my experience, peel and stick wallpaper works best on smooth, non-porous surfaces. While some heavy-duty types might work on very light textures (like orange peel), it’s generally not recommended. The texture creates thousands of tiny air pockets that can lead to bubbles and poor adhesion.
Q2: How do I fix a large bubble in peel and stick wallpaper? If it’s a large bubble and the wallpaper is freshly applied, your best bet is to gently peel back that section of the panel until you pass the bubble. Then, re-apply it slowly, using the center-out squeegee method described above. If it’s been on the wall for a while, the pin-prick method is your best option.
Q3: How long after painting can I apply removable wallpaper? This is a crucial question! You must wait for the paint to fully cure, not just be dry to the touch. I recommend waiting at least 3-4 weeks after painting before applying any self-adhesive wallpaper. Applying it too soon can damage the paint when you eventually remove the paper.