What Size Frames to Use for a Gallery Wall? A Designer’s Guide to Perfect Layouts
Staring at a blank wall with a stack of beautiful prints can feel both exciting and incredibly daunting. You know you want to create a stunning gallery wall, but one question stops you in your tracks: what size frames to use for a gallery wall?
Get it right, and you have a personal, breathtaking focal point. Get it wrong, and the whole arrangement can feel chaotic and “off.”
Don’t worry. As someone who has arranged dozens of gallery walls for my own home and for clients, I’ve learned the simple principles that make choosing frame sizes easy and fun. This guide will walk you through everything you need to know to move from confused to confident.
Key Takeaways for a Perfect Gallery Wall
Pressed for time? Here are the essential rules for choosing your frame sizes:
- Measure First, Buy Second: Always measure your total wall space before you even think about buying frames.
- Aim for 2-3 Inches of Space: The ideal gap between frames is typically 2-3 inches (5-8 cm). Consistency here is key.
- Mix It Up for Interest: For a modern, collected look, use a mix of 3-4 different frame sizes. A common combo is large (16×20), medium (8×10, 11×14), and small (5×7).
- Start with an “Anchor”: In an eclectic layout, always start by placing your largest piece of art (the anchor) slightly off-center and build outwards.
- When in Doubt, Go Symmetrical: For a formal, clean aesthetic, use frames that are all the same size and shape, arranged in a tight grid.
Step 1: Define Your Gallery Wall’s Style
Before you can pick a size, you need to pick a style. Your gallery wall’s personality will be the single biggest factor in determining what frame sizes you use.
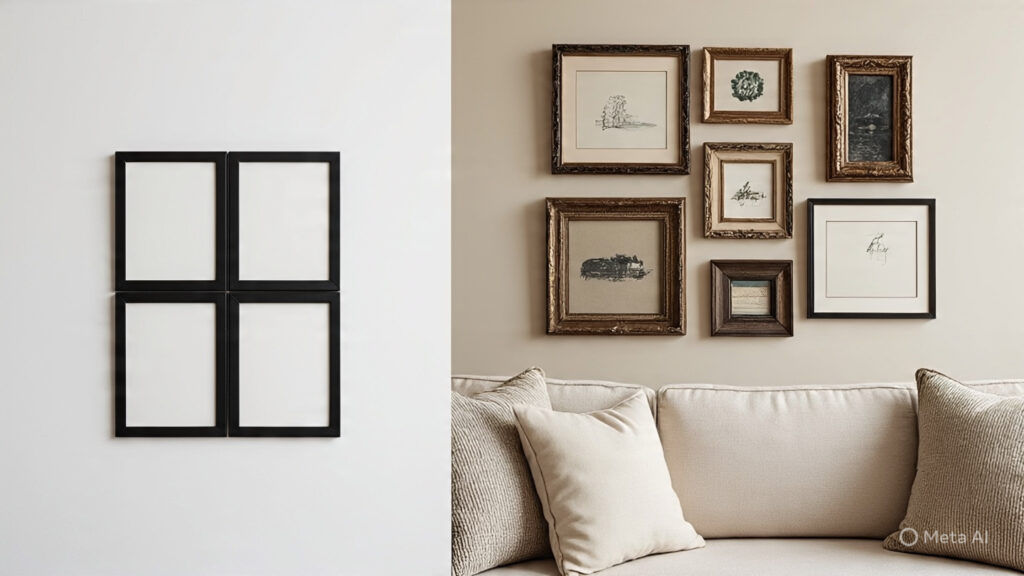
The Symmetrical Grid: Clean & Formal
This style is all about order and precision. You’ll use frames that are all the exact same size and orientation (e.g., all 12×12 inch square frames or all 11×14 inch vertical frames).
- Best For: Formal spaces like dining rooms, minimalist interiors, or creating a high-impact, cohesive statement.
- Pro Tip: For a grid layout, the matting inside the frame is crucial. Using identical white mats will make different-sized images look unified and professional.
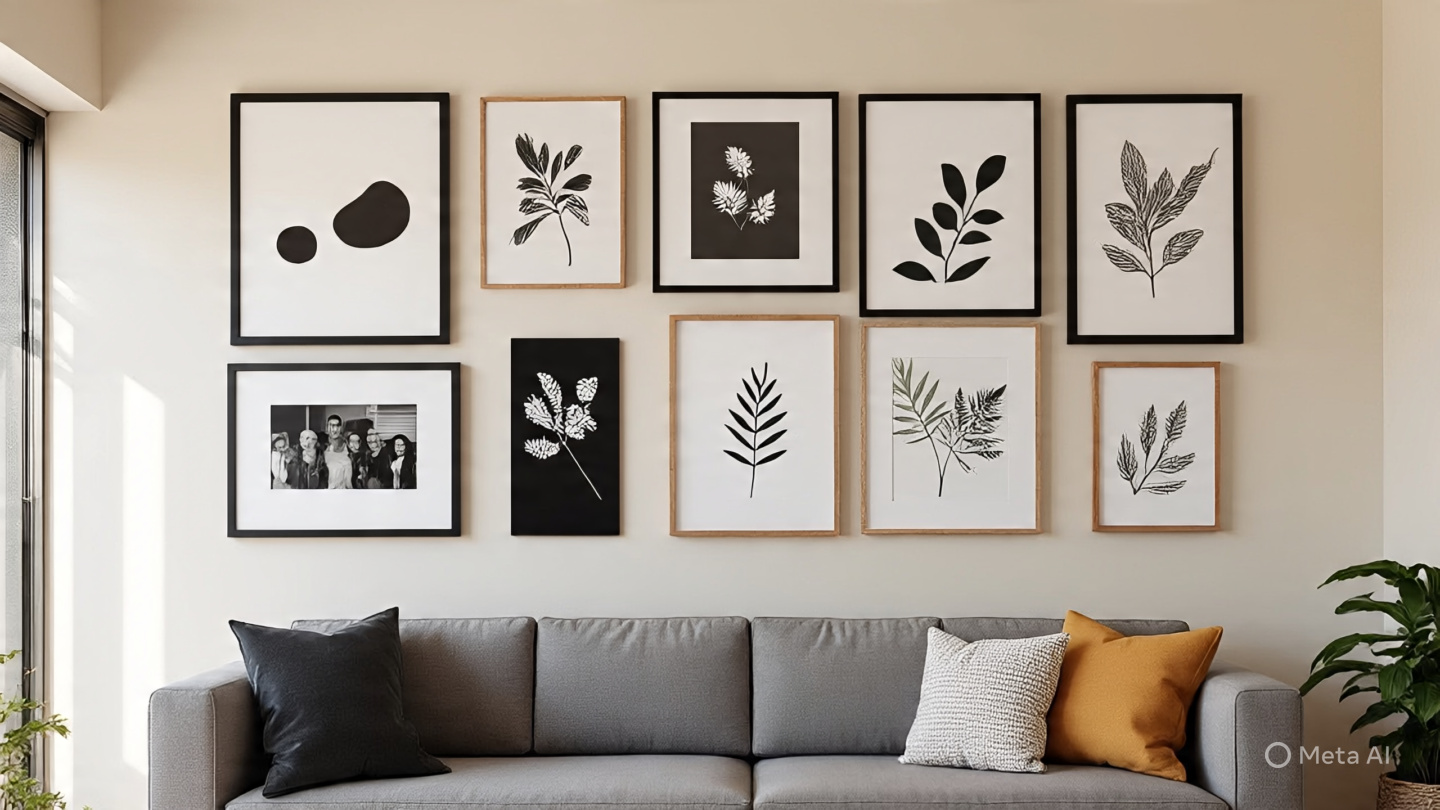
The Eclectic Cluster: Collected & Personal
This is the most popular style, and in my experience, the most fun! The goal is to make the collection look like it has grown over time. Here, you’ll mix and match different frame sizes, orientations, and even finishes.
- Best For: Living rooms, bedrooms, and staircases. It’s perfect for telling a personal story with a mix of photos, prints, and objects.
- The Key: The secret to a successful eclectic wall is finding a common thread. This could be a consistent color palette in the artwork, using all black frames, or sticking to a specific theme.
Step 2: Measure Your Space and Plan Your Layout
Never buy frames without a plan. You’ll save yourself time, money, and a lot of extra nail holes.
- Measure Your Wall: Use a tape measure to determine the total height and width of the area you want to fill. A good rule of thumb is to have the gallery wall occupy about two-thirds of the available wall space.
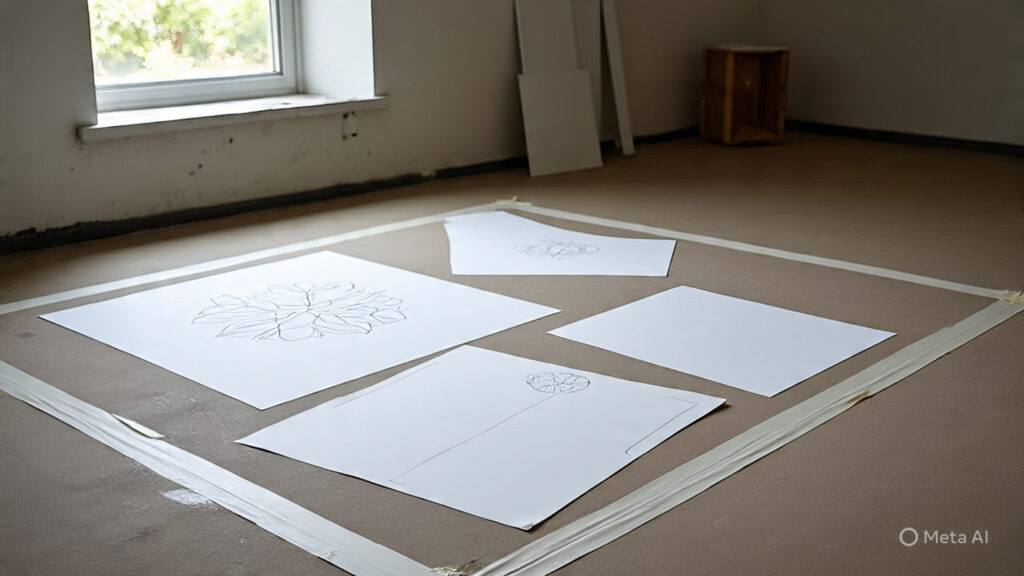
- Map it on the Floor: The best trick I’ve ever learned is to recreate your wall space on the floor. Use painter’s tape to mark the dimensions.
- Use Paper Templates: Cut out paper shapes that match the sizes of the frames you’re considering. You can arrange and rearrange these paper templates on the floor until you find a layout you absolutely love.
This hands-on method lets you see the true scale and balance before you commit. You’ll instantly know if you need a bigger anchor piece or more small frames to fill in the gaps.
Popular Frame Size Combinations That Just Work
Feeling stuck? Here are some foolproof combinations I turn to again and again.
For a Large Wall (e.g., Above a Sofa)
A large space needs a large “anchor” piece to ground the collection.
- One “Hero” Piece: Start with one large frame, like a 24×36 or 20×30 inch print.
- Two Medium Pieces: Add two medium frames, like 11×14 or 12×16 inches.
- Three to Four Small Pieces: Fill in the gaps with smaller frames, like 8×10 and 5×7 inches.
This combination creates a beautiful visual flow that draws the eye around the collection.
For a Staircase Gallery Wall
Staircases require a diagonal approach.
- Use a Mix of Medium and Small Frames: I find that a collection of 8×10 and 5×7 frames works best here. Using overly large frames can feel overwhelming on a narrow staircase.
- Follow the Ascent: Arrange the frames so they follow the upward line of the stairs. Keep the spacing between them consistent for a clean look. Want to learn more about the specifics of hanging? Check out our complete [Link to: Step-by-Step Guide to Hanging a Gallery Wall].
Pro Tips for a Designer-Level Gallery Wall
- Visual Weight is Key: Balance is about more than just size. A small, dark, intricate piece of art can have the same “visual weight” as a larger, lighter, more minimalist print. Step back and squint your eyes—if one area feels heavier than the others, adjust accordingly.
- Unify with Mats: If you’re mixing frames with different finishes (e.g., wood, gold, and black), make them feel cohesive by using the same color mat in every frame. It’s a simple trick that makes a huge difference.
- Consider Your Art: The art itself can help dictate the frame size. A busy, detailed piece might benefit from a larger mat and a simple frame to give it breathing room, while a simple graphic print might look great in a frame that fits it edge-to-edge. For more ideas, see our guide on [Link to: How to Choose Art for Your Gallery Wall].
For even more inspiration on creating beautiful compositions, the experts at [External Link to: Architectural Digest’s guide on arranging art] offer some fantastic visual examples from real designer homes.
Making Shopping Easy
If curating individual sizes feels overwhelming, a great shortcut is to purchase a pre-made set.
- (Affiliate Suggestion): Many retailers, like Amazon, offer Gallery Wall Frame Sets that come with 7 to 10 frames in pre-selected, complementary sizes. These kits often include paper templates, which makes mapping your layout incredibly simple. A set like the “Umbra Enframe Gallery Photo Frame Set” is a fantastic starting point.
Frequently Asked Questions
Q1: Should all frames in a gallery wall be the same size? No, they don’t have to be! Using frames of all the same size creates a formal, grid-style look. Mixing different sizes creates a more eclectic, casual, and personalized feel. Both are great options—it just depends on the style you prefer.
Q2: What is the most popular size for a gallery wall frame? The 8×10 inch and 11×14 inch frames are the workhorses of most gallery walls. They are incredibly versatile—large enough to stand on their own but small enough to be grouped together easily.
Q3: How far apart should I hang frames in a gallery wall? A consistent spacing of 2-3 inches (5-8 cm) between each frame is the professional standard. This gap is tight enough to make the collection feel like a single unit but provides enough space for each piece to breathe.
Q4: Can I include things other than pictures in my gallery wall? Absolutely! In my opinion, the best gallery walls have personal touches. You can mix in small mirrors, shallow baskets, decorative plates, or even your child’s framed artwork to add texture and personality.
Your Wall is a Story—Start Telling It
Choosing the right frame sizes is less about following rigid rules and more about finding a balance that feels right for your space and your story. Start with your style, make a plan on the floor, and don’t be afraid to experiment.
You now have the designer secrets to create a gallery wall that doesn’t just fill a space but brings it to life.